

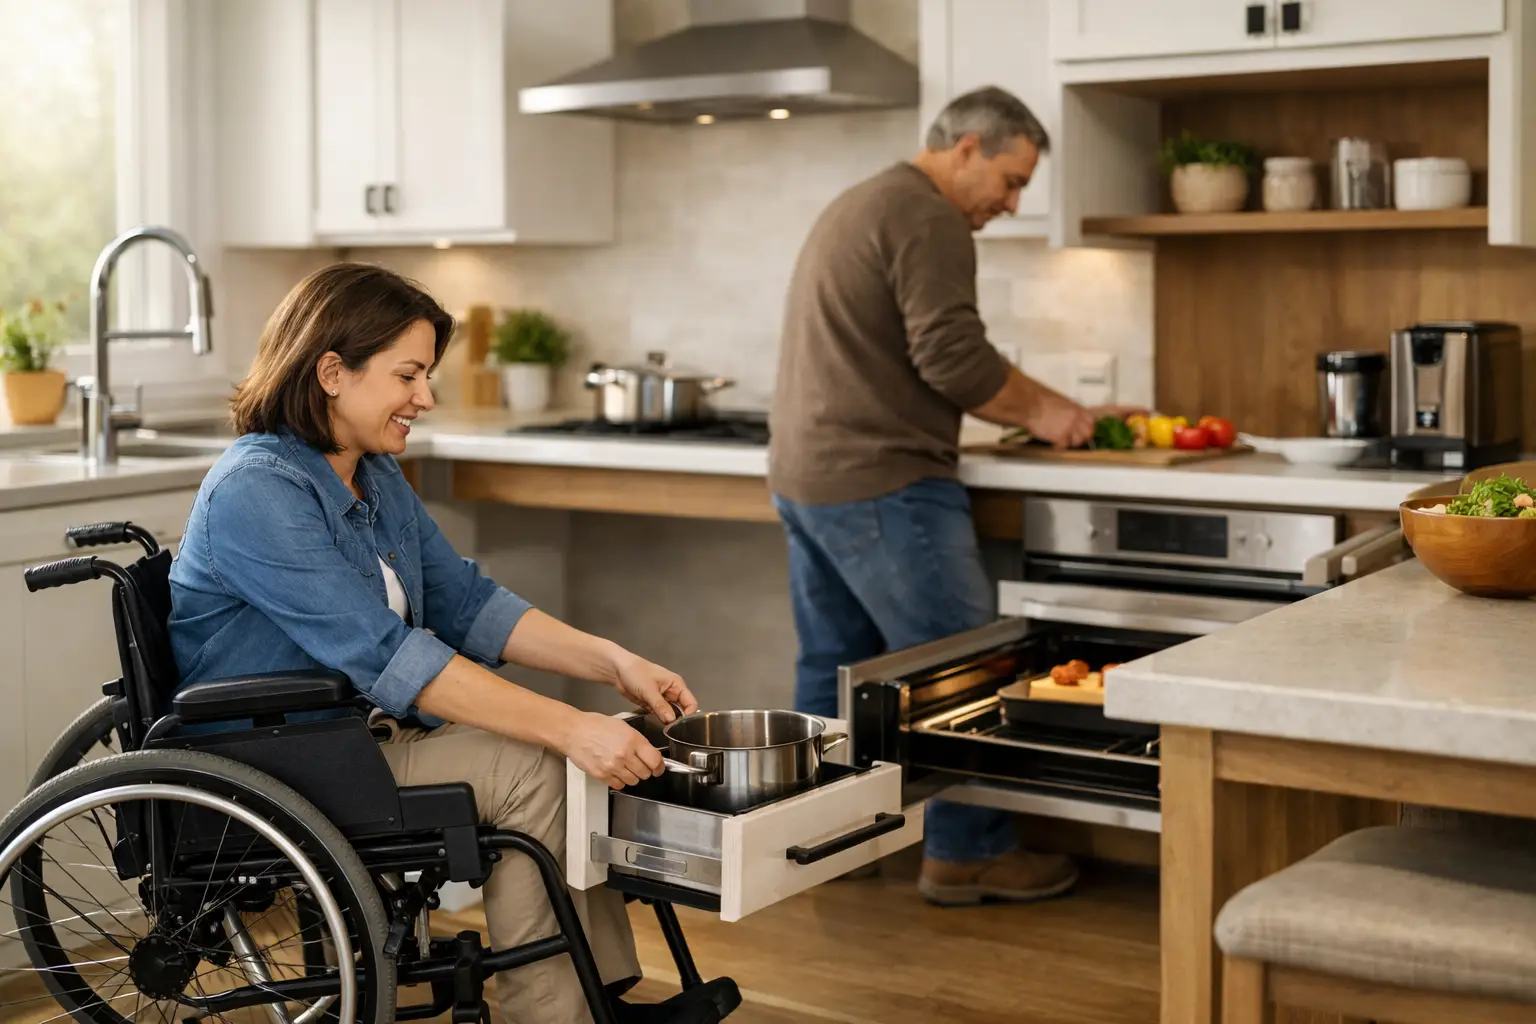
How to Plan Accessible Kitchen Layouts That Work
A kitchen can look newly renovated and still be difficult to use every day. A narrow route around an island, a microwave mounted too high, or a deep lower cabinet can turn routine cooking into unnecessary effort. Learning how to plan accessible kitchen spaces starts with designing around the people who will use the room – now and in the years ahead.
For homeowners in Southern Ontario and the GTA, accessibility planning is often part of a larger kitchen renovation, multigenerational home update, or aging-in-place strategy. The best results come from addressing layout, cabinetry, lighting, appliances, and construction details together. Retrofitting one element after the finishes are installed is usually more disruptive and more expensive.
Start With Daily Movement, Not Cabinet Colors
An accessible kitchen should support real routines: entering with groceries, moving between the refrigerator and sink, preparing a meal, sitting down for a break, and cleaning up safely. Before selecting materials or appliances, consider who uses the kitchen, what physical needs are present, and which needs may change over time.
A homeowner who uses a wheelchair has different clearance requirements than someone who walks independently but has limited balance, reach, or hand strength. A family may also need a kitchen that works for an aging parent today without making the room feel institutional for everyone else. Accessibility is not one fixed design formula. It is a practical response to the people, space, and budget involved.
Walk through your current kitchen and identify friction points. Notice where people bump into each other, where doors block pathways, which items require bending or reaching, and whether task areas have enough lighting. These observations give the renovation team useful direction before drawings and permit planning begin.
Plan an Accessible Kitchen Layout With Clear Paths
Floor space is the foundation of an accessible kitchen. Clear travel routes allow users to move safely between work zones and provide room for mobility devices, caregivers, or more than one cook. Tight galley kitchens can be improved, but they require especially careful coordination of cabinet depth, appliance door swings, and traffic flow.
For many accessible kitchen projects, a clear aisle of at least 42 inches is a practical starting point, while 48 to 60 inches may better support wheelchair turns and two-person use. Exact requirements depend on the layout, the user’s mobility equipment, local code considerations, and the surrounding spaces. A contractor and designer should verify dimensions early rather than assuming standard kitchen measurements will work.
Islands deserve close attention. They can add valuable work surface and seating, but an oversized island often becomes the obstacle at the center of the room. In some homes, a smaller peninsula, mobile worktable, or open U-shaped layout delivers better access while preserving storage and prep space.
Keep the refrigerator, sink, and cooking area within an efficient working path. The goal is not to recreate a rigid design rule. It is to reduce unnecessary walking, carrying, turning, and reaching. A user should be able to transfer a pot from the cooktop to a nearby landing area without crossing the room.
Design Doorways and Transitions for Easy Entry
Kitchen access begins before anyone reaches the cabinets. Doorways should provide adequate clear width, especially where a wheelchair, walker, or caregiver may be involved. Level floor transitions also reduce trip hazards and make mobility easier.
When renovating an older home, this may mean adjusting a doorway, relocating a wall, or correcting uneven flooring between the kitchen and adjacent room. These structural details affect cost and scheduling, which is why they should be reviewed during the planning stage rather than treated as finish work.
Make Work Zones Comfortable at Any Height
Standard counter height does not suit every user. An accessible kitchen may include counters at more than one height so that standing and seated users can prepare food comfortably. Lowered work surfaces are useful for wheelchair users, children, and anyone who finds extended standing difficult.
A section of counter with open knee clearance below can create a usable seated prep area. The countertop should be shallow enough to allow reach to the backsplash and outlets without strain. Positioning this area near the sink or cooktop may be helpful, but it depends on how the user cooks and whether heat, water, and electrical controls can be safely managed.
Sinks can also be designed for easier use with shallow basins, insulated plumbing below, and lever-style or touchless faucets. A pull-down spray faucet can reduce lifting and improve cleanup, but it should be easy to operate with limited grip strength. Controls should be intuitive and placed within comfortable reach.
For cooking, induction cooktops are often a strong option because the surface does not stay hot in the same way as traditional electric elements. Front-mounted controls reduce the need to reach across hot cookware. Wall ovens installed at an appropriate height can also be safer than bending to use a low oven, provided there is a nearby heat-resistant landing surface.
Choose Storage That Comes to You
Accessible storage is less about having more cabinets and more about reaching what is inside them safely. Deep base cabinets can hide frequently used items at the back, forcing users to bend, kneel, or lift awkwardly. Full-extension drawers, pull-out shelves, and organized interior accessories bring cookware and pantry items forward.
Place everyday dishes, food, and small appliances between knee and shoulder height whenever possible. Reserve high shelves for lightweight, occasional items. Lower drawers are generally easier to use than low shelves, especially for pots, pans, and dry goods.
Cabinet hardware matters as well. D-shaped pulls are often easier to grip than small knobs. Touch-latch or motorized systems can help in certain applications, although they add cost and may require maintenance over time. The right choice depends on the user’s hand strength, dexterity, and preference.
Consider appliance placement as part of the storage plan. A drawer-style dishwasher can reduce bending in some kitchens, while a side-opening oven may provide safer access for a seated user. Refrigerators with French doors and a lower freezer drawer can offer practical access, but the best model is the one that matches the household’s reach range and food-storage habits.
Build Safety Into Finishes and Lighting
Accessibility should not be limited to measurements. Surfaces, lighting, and hardware all affect confidence and safety in daily use. Select flooring with slip resistance and avoid abrupt changes in level. Matte or low-glare finishes can be easier on the eyes than highly reflective surfaces, particularly near windows and under bright task lights.
Good lighting should cover the whole kitchen, then add focused light where work happens. Under-cabinet lighting improves visibility at counters. Bright, evenly distributed light at the sink, cooktop, pantry, and entry points helps users see spills, edges, and controls. Dimmers can make the room more comfortable at different times of day.
Use visual contrast thoughtfully. A countertop edge that contrasts gently with the floor or cabinetry can help define surfaces for users with low vision. The same approach can make appliance controls, cabinet pulls, and switches easier to locate. High contrast does not mean harsh colors. It means clear visual definition.
Coordinate Accessibility With Construction Requirements
A well-designed accessible kitchen requires more than product selections. Walls may need to be opened for plumbing relocation, electrical upgrades, added circuits, structural changes, or reinforcement for future supports. Venting, flooring transitions, appliance clearances, and permit requirements need to be coordinated before work begins.
This is where full project management protects the homeowner. An experienced renovation contractor can coordinate drawings, permits, trades, schedules, inspections, and site conditions so accessibility details are not lost between the designer, cabinet supplier, electrician, plumber, and installer.
At Canex Group of Companies, accessibility renovations are managed as complete construction projects, with attention to the practical details that affect daily living and long-term value. Clear communication, accountable scheduling, and disciplined budget management help homeowners make confident decisions from planning through completion.
Leave Room for Future Changes
Not every accessible feature needs to be installed on day one. If budget or current needs are limited, plan the renovation so future modifications are possible without another major teardown. This might include placing electrical outlets for a future lift system, reinforcing walls where supports may be needed, selecting adaptable cabinetry, or preserving adequate clearance around key work areas.
The most successful accessible kitchens do not announce themselves as specialized spaces. They feel comfortable, organized, attractive, and easy to use. When the planning is done well, the kitchen supports independence without asking its users to work around the room.