

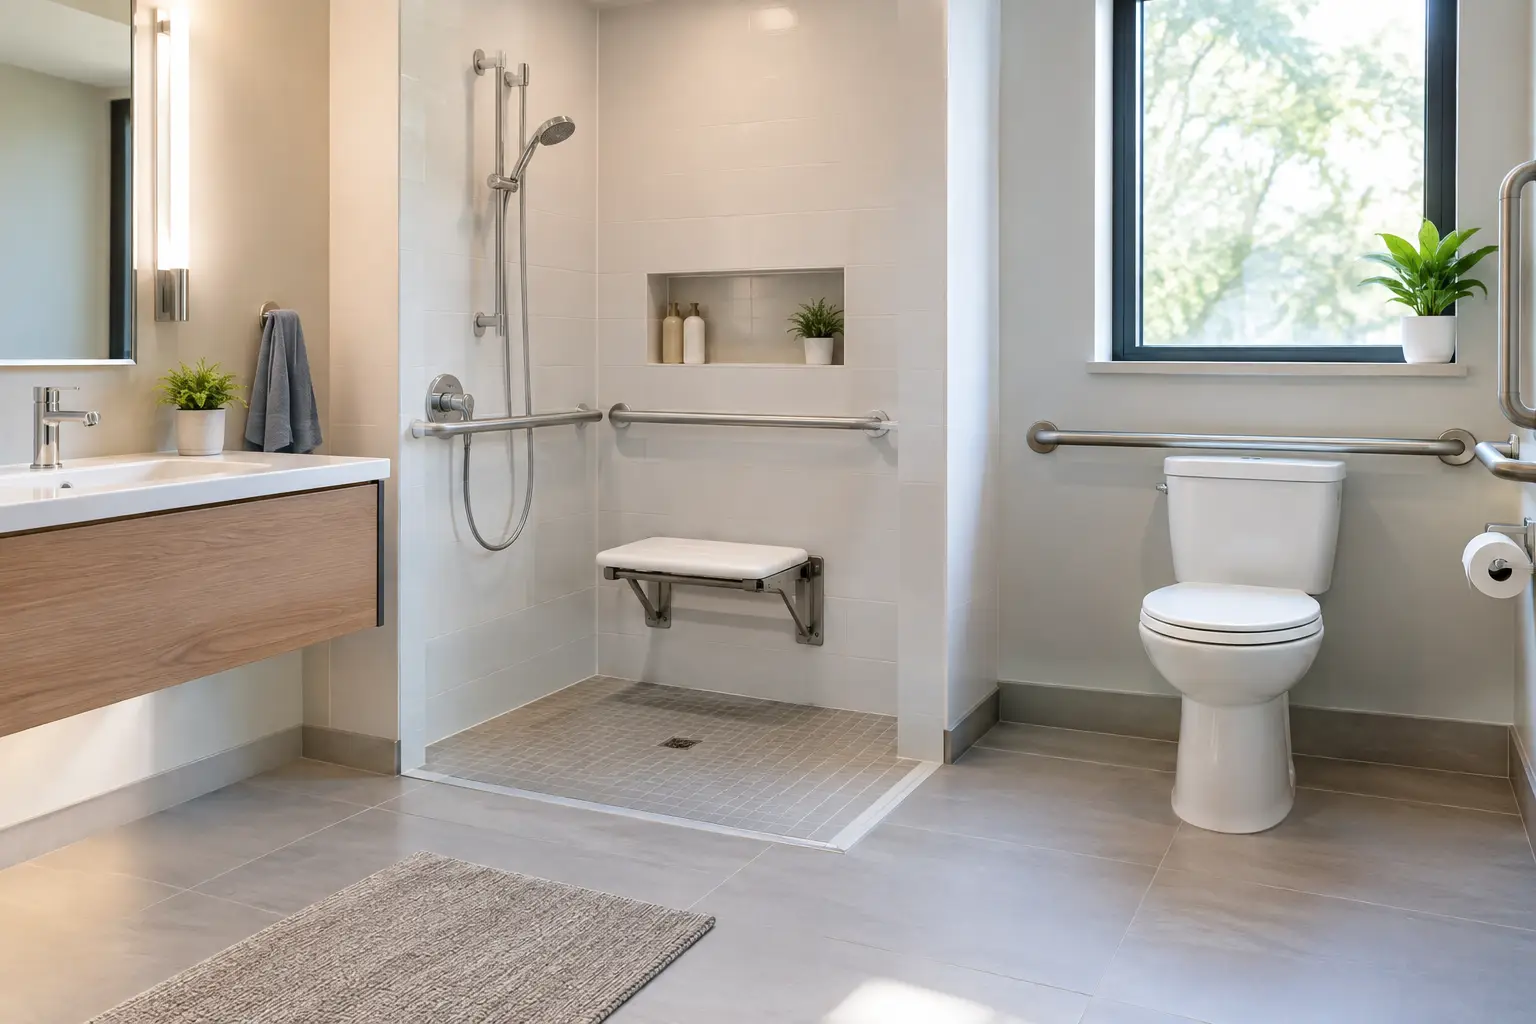
Accessible Bathroom Dimensions That Work
A bathroom can look spacious on a floor plan and still be difficult to use when a walker, wheelchair, caregiver, or limited mobility is part of daily life. Accessible bathroom dimensions are not just a code exercise. They determine whether a person can enter, turn, transfer safely, reach essential fixtures, and maintain independence without compromising the rest of the home.
For a renovation, the right layout starts with real use. Who will use the space now? Will their needs change over the next five or ten years? Is this a private primary bathroom, a shared family bath, a condo suite, or a commercial washroom? Those answers affect the required footprint, fixture selection, door swing, plumbing locations, and budget.
Start With the Clear Floor Space
Accessibility depends on unobstructed space, not simply the overall room size. A room may measure 8 by 8 feet, but a deep vanity, inward-swinging door, and toilet placed too close to a wall can eliminate the room needed to manoeuvre.
A common accessibility benchmark is a 60-inch-diameter turning circle for a wheelchair. A T-shaped turning space may also work where a full circle is impractical. The usable area must remain clear of cabinets, fixture projections, and door swings. This is often the first constraint that reshapes a renovation plan.
Plan for a clear floor area at each key fixture as well. A 30-by-48-inch clear space is a widely used minimum for a wheelchair approach, though the direction of approach matters. A forward approach to a vanity has different clearance needs than a parallel approach beside a toilet or shower.
In smaller bathrooms, the most effective solution is often not making every fixture smaller. It may mean moving a wall, selecting a wall-hung vanity, changing the door configuration, or relocating plumbing. Good planning prevents expensive corrections after finishes are installed.
Accessible Bathroom Dimensions at the Door
The bathroom door sets the first practical limit. For many accessible layouts, the door needs at least 32 inches of clear opening width when opened to 90 degrees. That is not the same as ordering a 32-inch door. The door slab, hinges, jamb, and hardware reduce the clear opening, so a wider nominal door is often needed to achieve the required clearance.
Door swing deserves equal attention. An inward-swinging door can block the turning space or make the room inaccessible if someone falls behind it. An outswing door, pocket door, or properly installed sliding door can preserve valuable floor area. Each option has trade-offs: pocket doors require clear wall cavity space, and sliding doors need reliable hardware and a layout that allows the user to operate the door comfortably.
For commercial or public-facing projects, door manoeuvring clearances on the latch side must also be considered. These requirements vary by applicable code and are not something to estimate during construction. Confirm them before framing begins.
Toilet Clearance and Transfer Space
The toilet area needs space for a side transfer from a wheelchair, as well as room for a caregiver where required. Under common ADA-based guidelines, the toilet centerline is typically positioned 16 to 18 inches from the adjacent side wall. The clear width around the toilet is commonly 60 inches, with required clearance extending from the side wall and behind the fixture.
The exact rear clearance can differ depending on whether the toilet is wall-hung or floor-mounted. That distinction matters early because wall-hung fixtures require in-wall support framing and plumbing coordination. They can make cleaning easier and create a cleaner visual line, but they are not automatically the best choice for every renovation.
Toilet height also affects safety. A comfort-height toilet, generally around 17 to 19 inches from the finished floor to the top of the seat, is often easier for adults with mobility limitations to use. It should be selected alongside the grab bar layout, not afterward.
Grab bars need solid blocking behind the finished wall. Typical accessible installations place grab bars 33 to 36 inches above the finished floor, but dimensions, lengths, and locations depend on the applicable standard and fixture configuration. Decorative bars or towel bars are not substitutes. Properly rated grab bars must be anchored to framing or approved backing.
Shower Dimensions That Support Safe Use
A curbless shower is one of the most valuable accessibility upgrades in a residential bathroom. It removes the raised threshold that creates a trip hazard and makes wheelchair entry possible. However, a true curbless shower requires careful planning for floor slope, waterproofing, drain location, framing depth, and tile transitions.
A compact transfer shower may have a minimum interior size of 36 by 36 inches under certain accessibility standards. A roll-in shower generally needs more room. Common configurations include a 30-by-60-inch roll-in shower or a larger 36-by-60-inch alternate layout, depending on the standard being followed.
For many homes, a 60-by-36-inch curbless shower offers a practical balance of comfort and footprint. It provides more room for a shower chair, handheld showerhead, grab bars, and assistance when needed. A larger shower can be worthwhile when the room allows it, especially in a forever-home renovation.
Do not overlook the space outside the shower. The entry must connect to a clear route through the room, and the shower controls should be reachable without forcing the user to step into the spray. A fixed glass panel can look refined, but it may restrict access if it is too long or poorly positioned. In some layouts, a shower curtain on a properly designed track gives greater flexibility.
Vanity and Sink Clearance
A standard vanity can become a barrier when it fills the knee space needed for a seated user. An accessible lavatory commonly requires clear space below the sink, including knee clearance at least 27 inches high, 30 inches wide, and 19 inches deep at the appropriate point. Exposed hot-water and drain pipes need protection to prevent contact burns or injuries.
This does not mean every accessible bathroom must have an institutional appearance. Wall-mounted sinks, open-bottom vanities, and thoughtfully designed floating cabinetry can provide clearance while maintaining storage and a finished residential look. The trade-off is that reducing lower cabinetry may require storage to move to a reachable side cabinet, recessed niche, or adjacent linen area.
The countertop and controls must also be usable. Lever handles, touchless faucets, or single-lever fixtures are generally easier to operate than small twist knobs. Mirrors, light switches, outlets, and accessories should be placed where they can be reached from a seated or standing position.
Code Requirements Are Not the Same as Good Design
The Americans with Disabilities Act applies to many public and commercial settings, but not every private residence. State and local building codes, fair housing requirements, condominium rules, and project-specific accessibility goals can all affect the final design. A bathroom that works well for an aging homeowner may not need the same configuration as a public washroom, while a multi-unit or commercial project may have mandatory requirements beyond basic clearances.
This is why dimensions should never be copied from a generic diagram without verifying the governing requirements. The applicable rules may address turning space, fixture clearances, door hardware, shower thresholds, alarms, slope, pipe protection, and many other details. In a major renovation, early coordination between the homeowner, designer, contractor, and permit authority protects the schedule and helps control change-order costs.
Plan Accessibility Before Demolition
The least expensive time to solve an accessibility issue is before demolition. Existing plumbing stacks, structural walls, floor joists, HVAC runs, and electrical locations can all influence what is possible. A contractor should review these conditions before promising that a shower can be lowered, a door can be widened, or a wall can be moved.
A clear scope also protects the budget. Define the intended standard, identify the users’ needs, confirm the dimensions on drawings, and specify critical products before construction starts. This includes shower drains, doors, toilets, grab bars, vanities, faucets, and flooring. Small decisions add up quickly in an accessible bathroom because every component affects clearance and safe use.
The best accessible bathroom does not feel like an afterthought or a temporary accommodation. It feels comfortable, durable, and easy to use every day. Give the layout the attention it deserves at the planning stage, and the finished room can support independence, safety, and peace of mind for years to come.